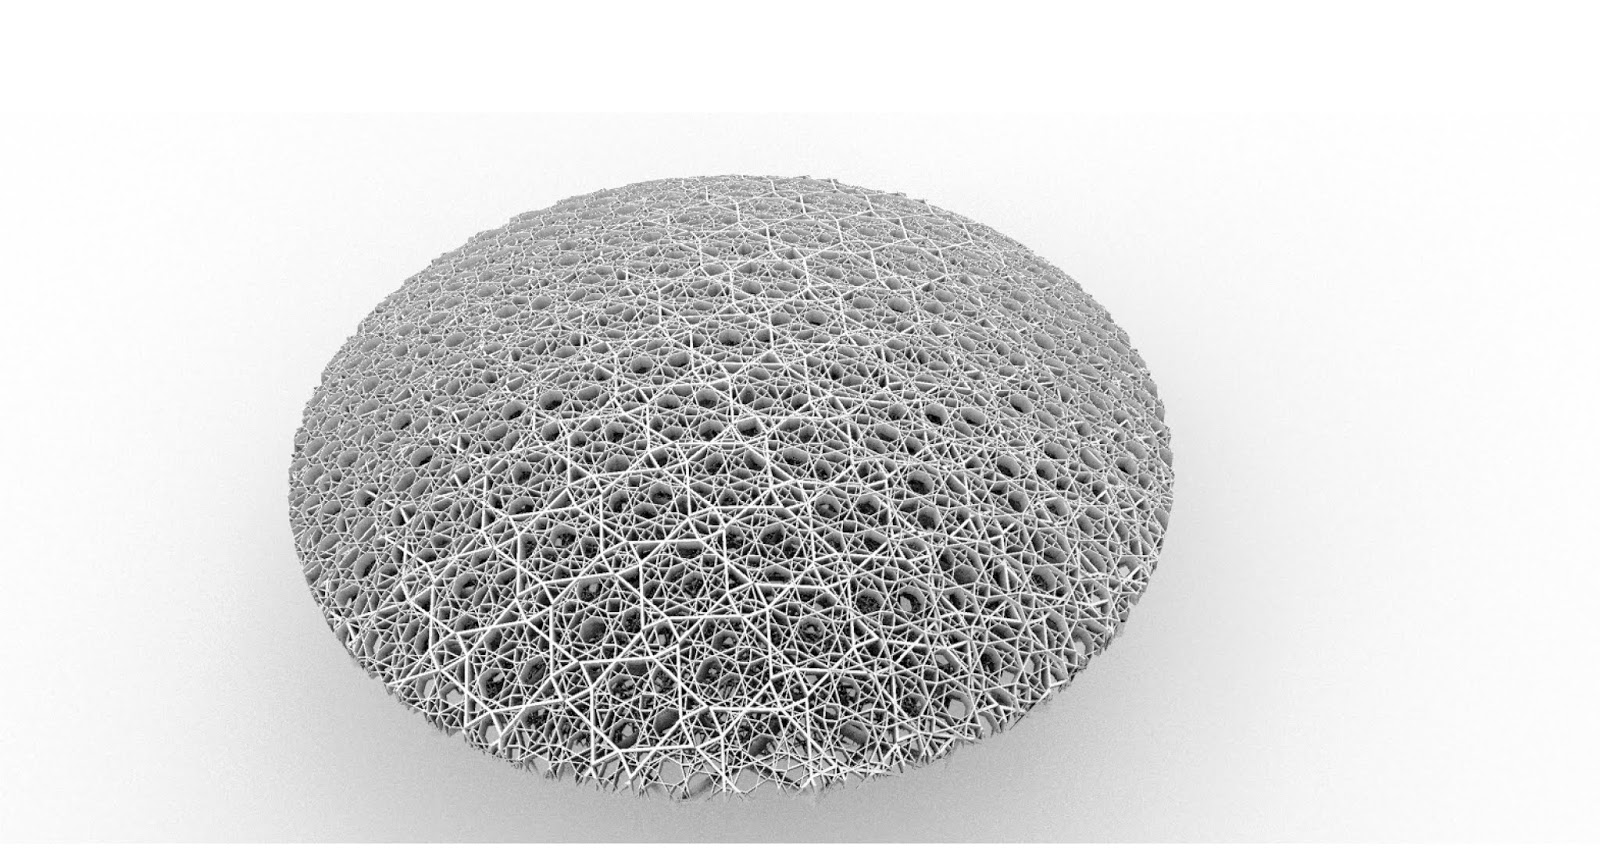
The case study I chose for project one is Louvre Museum in Abu Dhabi, my goal is to create the dome structure which allows sunlight to easily go through and light up the interior space.
Figure 2
Figure 3
The dome is composed of different patterned layers, and a truss structure attached with the upper dome layers and other layers below.
Figure 4
Figure 5
The dome is built above the museum gallery, it looks like it's floating above the sea.
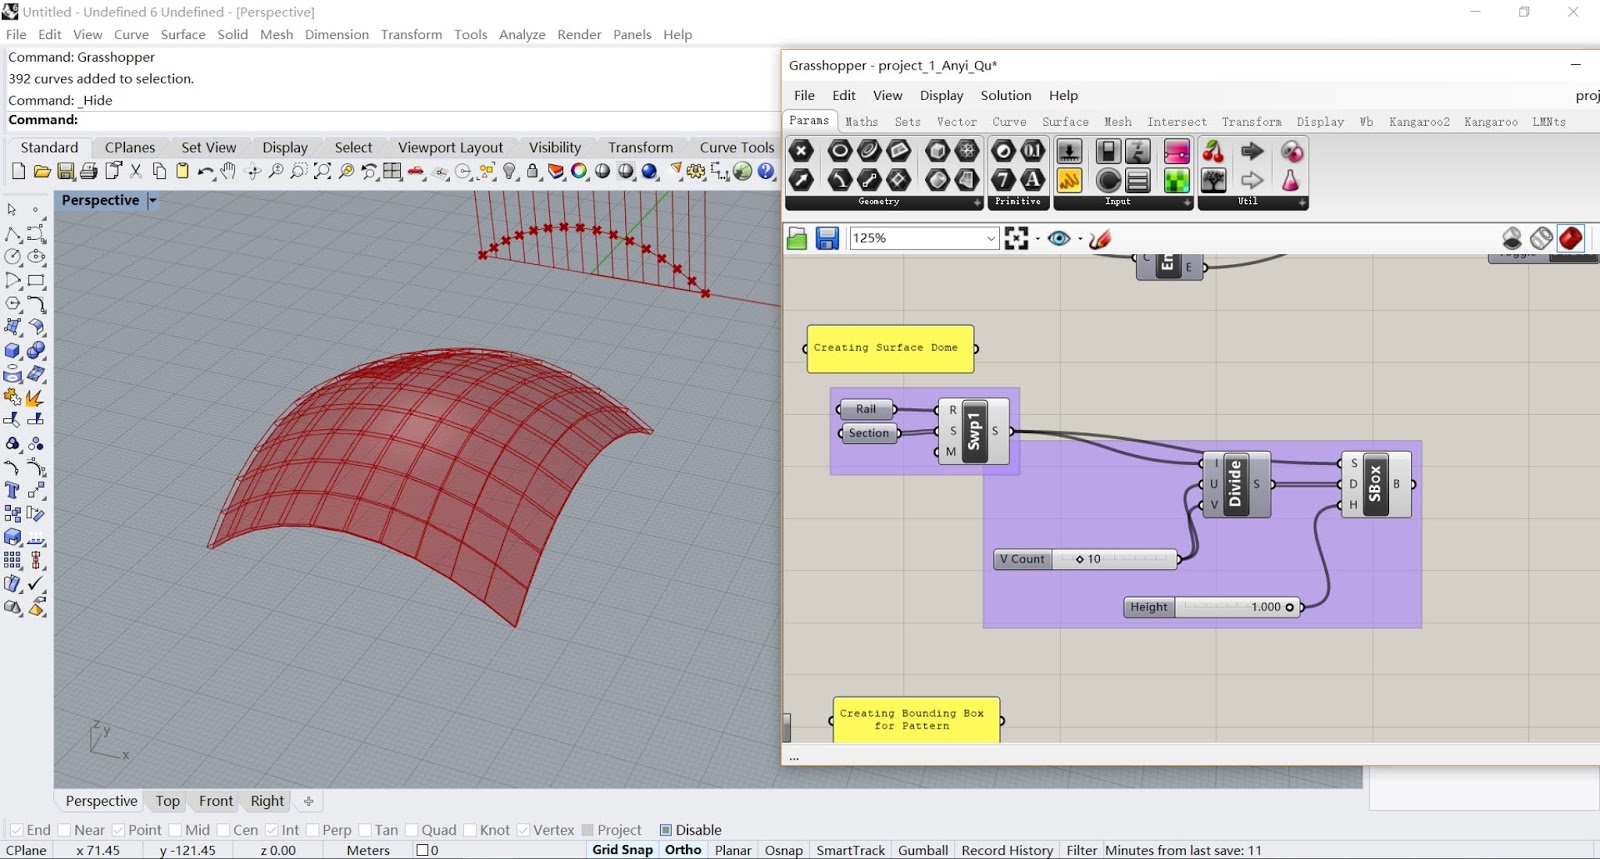
To build the cover-shaped dome, I created a Catenary curve using the UnaryForce and Kangaroo, which I can use the number slider to control the segments number and the stiffness.
Screenshot 2
I bake the catenary curve and rotated it twice with 90°, and use the Sweep1 function to build a curved surface.
Screenshot 3
In order to inset the pattern, I divide the surface with 10×10 squares, and transform them into SolidBox with height. For different layers, I change the number slider with 10×10, 15×15, 20×20, 25×25, 30×30, 35×35 to build 6 different layers.
Screenshot 4
For the pattern, I traced the shape in AutoCAD, and extrude the curve and build a geometry. Using BoundingBox function to create a boundary box.
Screenshot 5
I insert boundingbox into the solidboxes and get a patterned geometry.
Screenshot 6
For the cover dome, in order to only get the center circle shape, I create a cylinder extruded from a circle curve to cut the geometry.
Screenshot 7
Using SolidDifference, bake the geometry and delete the outer useless part. Repeat this step for other 5 layers.
Screenshot 8
For the supporting truss, I first draw the radial shape in AutoCAD, then extrude the shape through Z Unit.
Screenshot 9
To get the same shape as other 6 patterned dome layers, I need to split the geometry by the curved surface I just created, bake it and delete the upper part.
Screenshot 10
After that, I copy the surface in Z Unit, split the geometry again and delete the useless part below.
Screenshot 11
Now I have 1 supporting truss and 6 patterned dome layers. I align them with the centroid point, rotate them with certain degrees to get a chaos pattern from top view.
Screenshot 12
I put 3 layers above truss for outer dome, and 3 layers under the truss for inner dome.
Screenshot 13
The Rhino rendering in top view.
Screenshot 14
I build a part of the museum gallery in SketchUp, and imported into Lumion with the dome above.
Screenshot 15
The volume light is used to mimic the natural sunlight condition.


No comments:
Post a Comment